How to connect your chatbot to Stripe ?
What’s a Rich Text element?
The rich text element allows you to create and format headings, paragraphs, blockquotes, images, and video all in one place instead of having to add and format them individually. Just double-click and easily create content.
Static and dynamic content editing
A rich text element can be used with static or dynamic content. For static content, just drop it into any page and begin editing. For dynamic content, add a rich text field to any collection and then connect a rich text element to that field in the settings panel. Voila!
How to customize formatting for each rich text
Headings, paragraphs, blockquotes, figures, images, and figure captions can all be styled after a class is added to the rich text element using the "When inside of" nested selector system.
What is Stripe?
Stripe enables businesses to process payment within their website. Your client can pay for their product or subscription via their credit and debit card and the fund will be deposited into your business bank account.
Moreover, with Stripe you can even accept payment via mobile wallet and more. Stripe can process many currency and it is truly a vital asset to any business, small or big.
How does Stripe work?
Stripe make it easy for business to process their payment so they can concentrate on their core product.
For the client side, here how it works:
- The client provide their credit card information for the payment
- Stripe receive the information and encrypt it
- The payment in processed by Stripe's payment gateway
- The bank check whether the fund are available or not
- A response is send to the client to tell them if the payment have been process or not
The fund stays in your Stripe account until you transfer it to your bank account. You can schedule the fund transfer whenever you like or recurrently, such as every week or month.
Stripe takes a small fee for each transaction, those fees vary by transaction type and other parameters.
Stripe Chatbot Tutorial
First, you should create a Stripe account and set it up completely. Then, follow the steps bellow to connect your chatbot to Stripe.
To activate, you must follow these few steps :
1- Connect your Stripe Account by going to the Settings > Integrations > Connect with Stripe
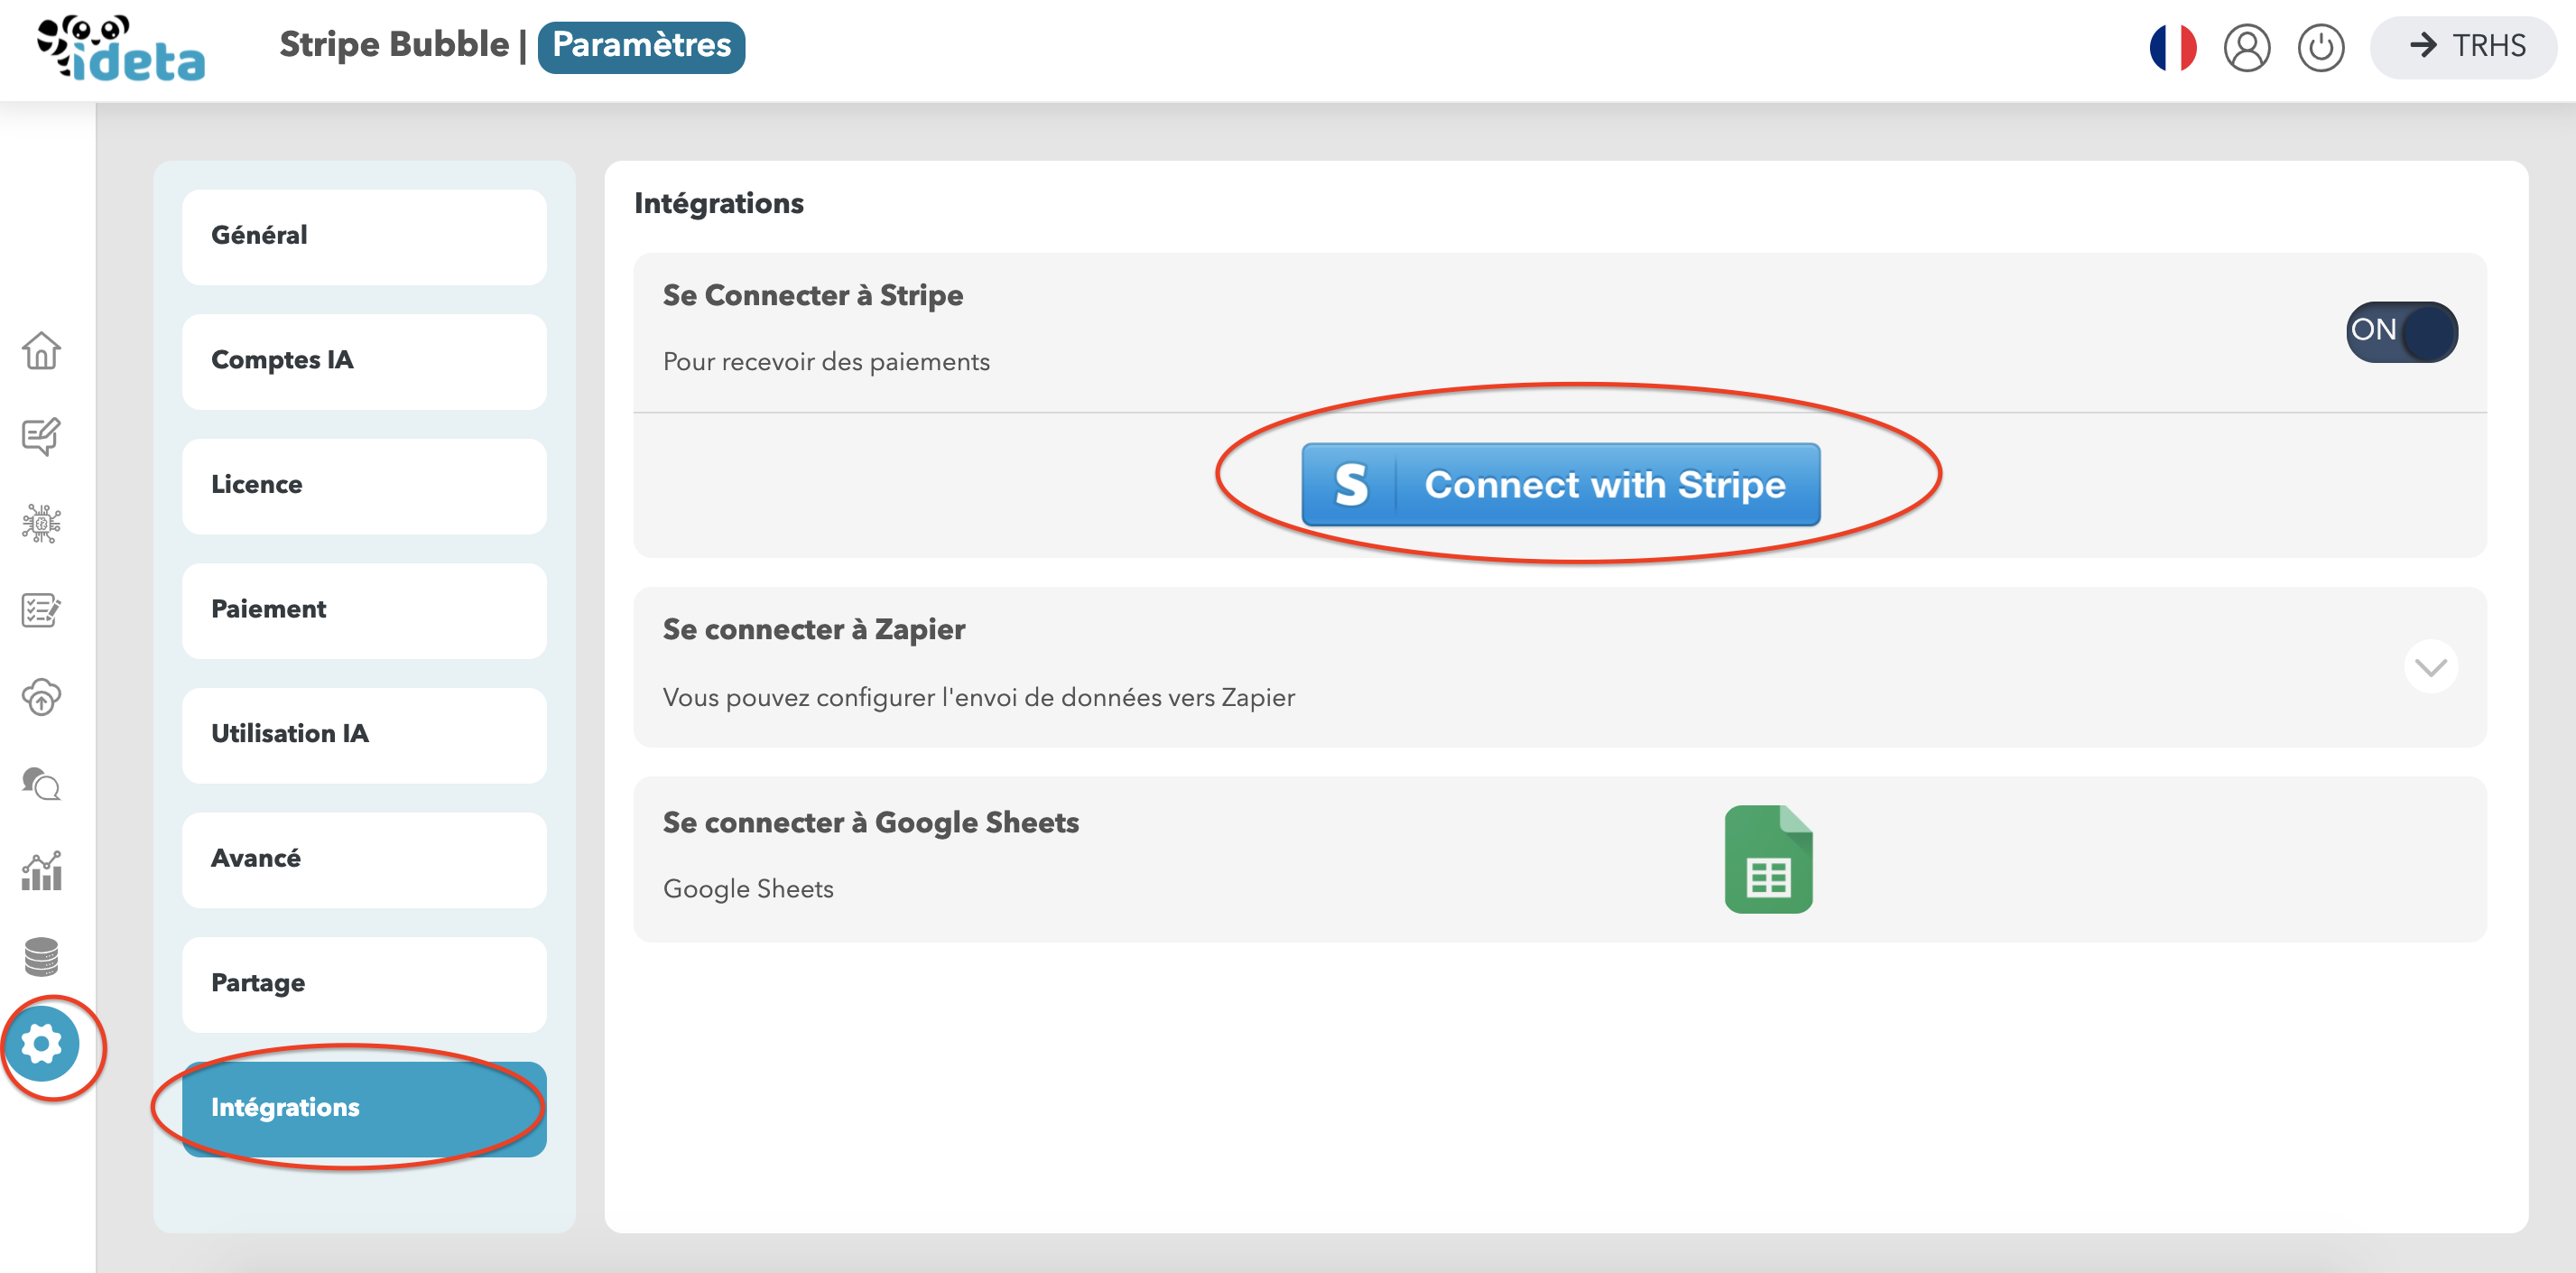
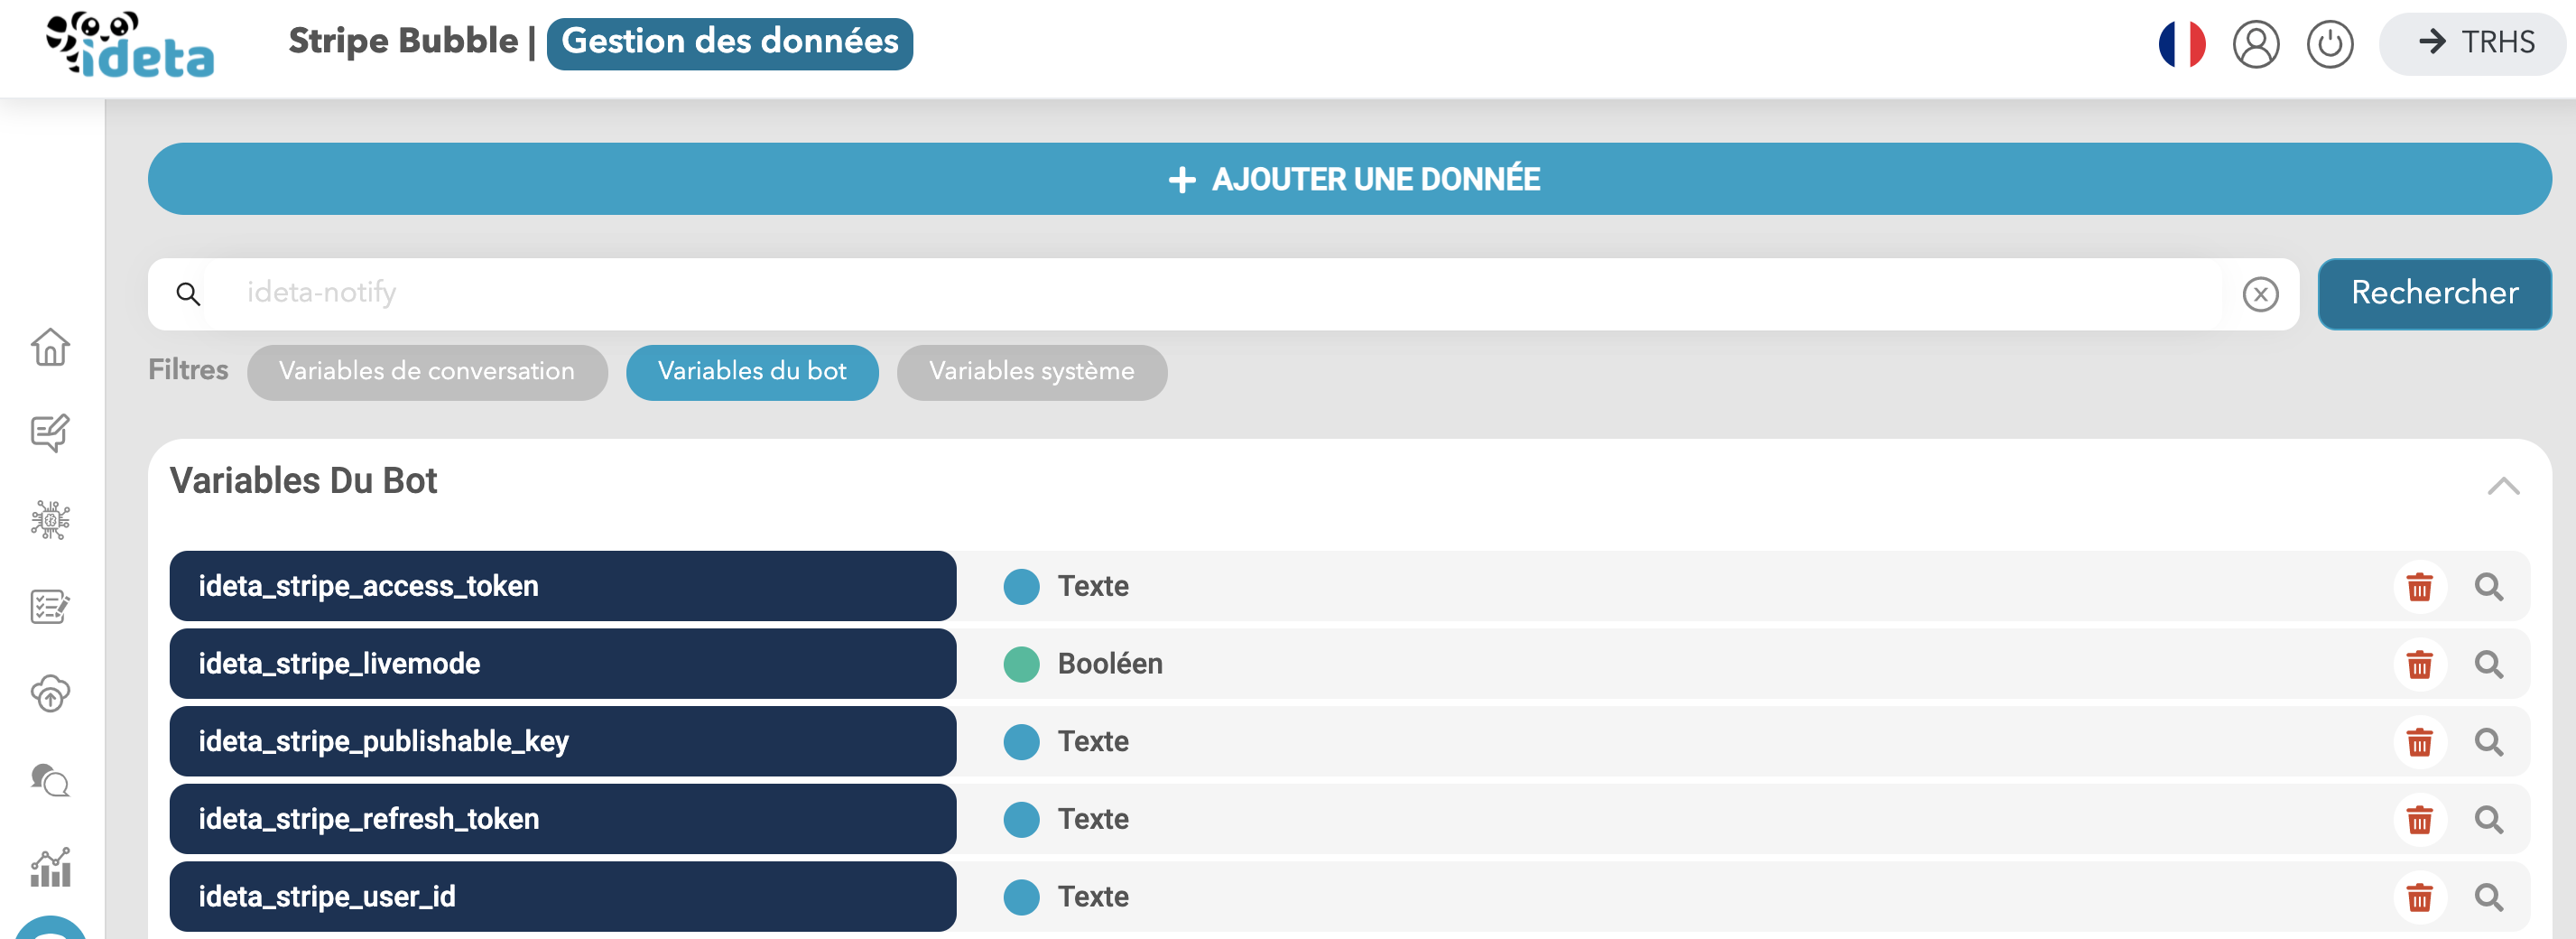
Follow the process. When it is done, 5 bots variables (identical throughout all conversations) are created. We will need them later.
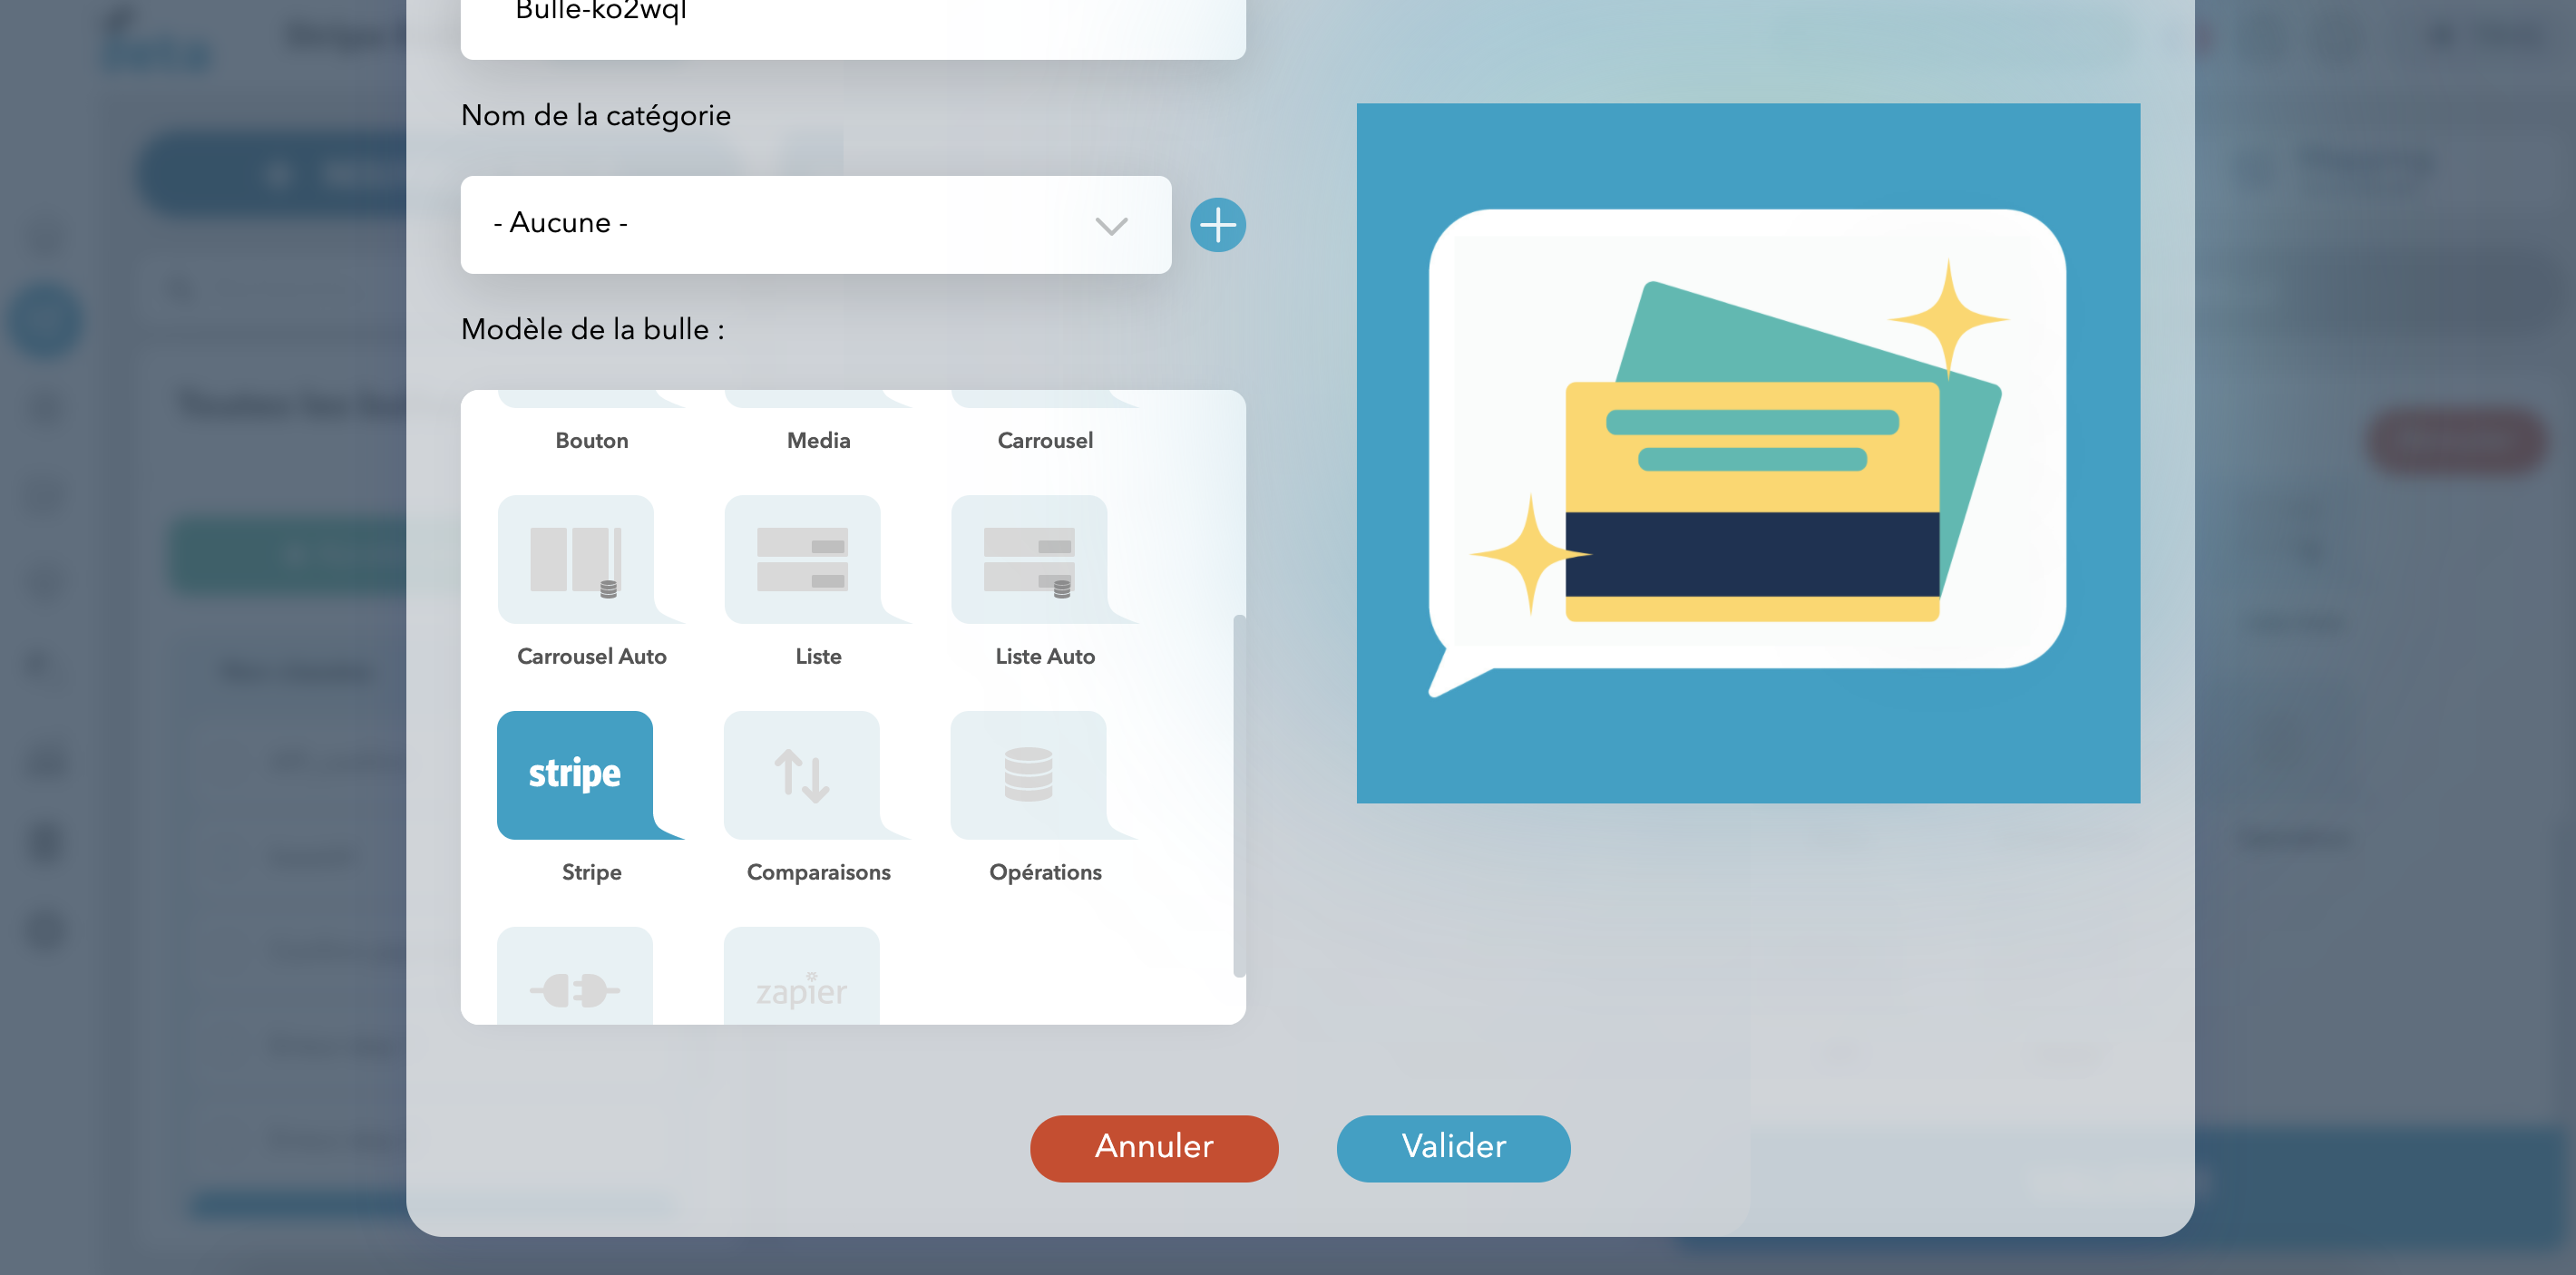
2- Create your Stripe bubble
When you need to collect payment in your conversation flow, you can insert a Stripe Bubble.
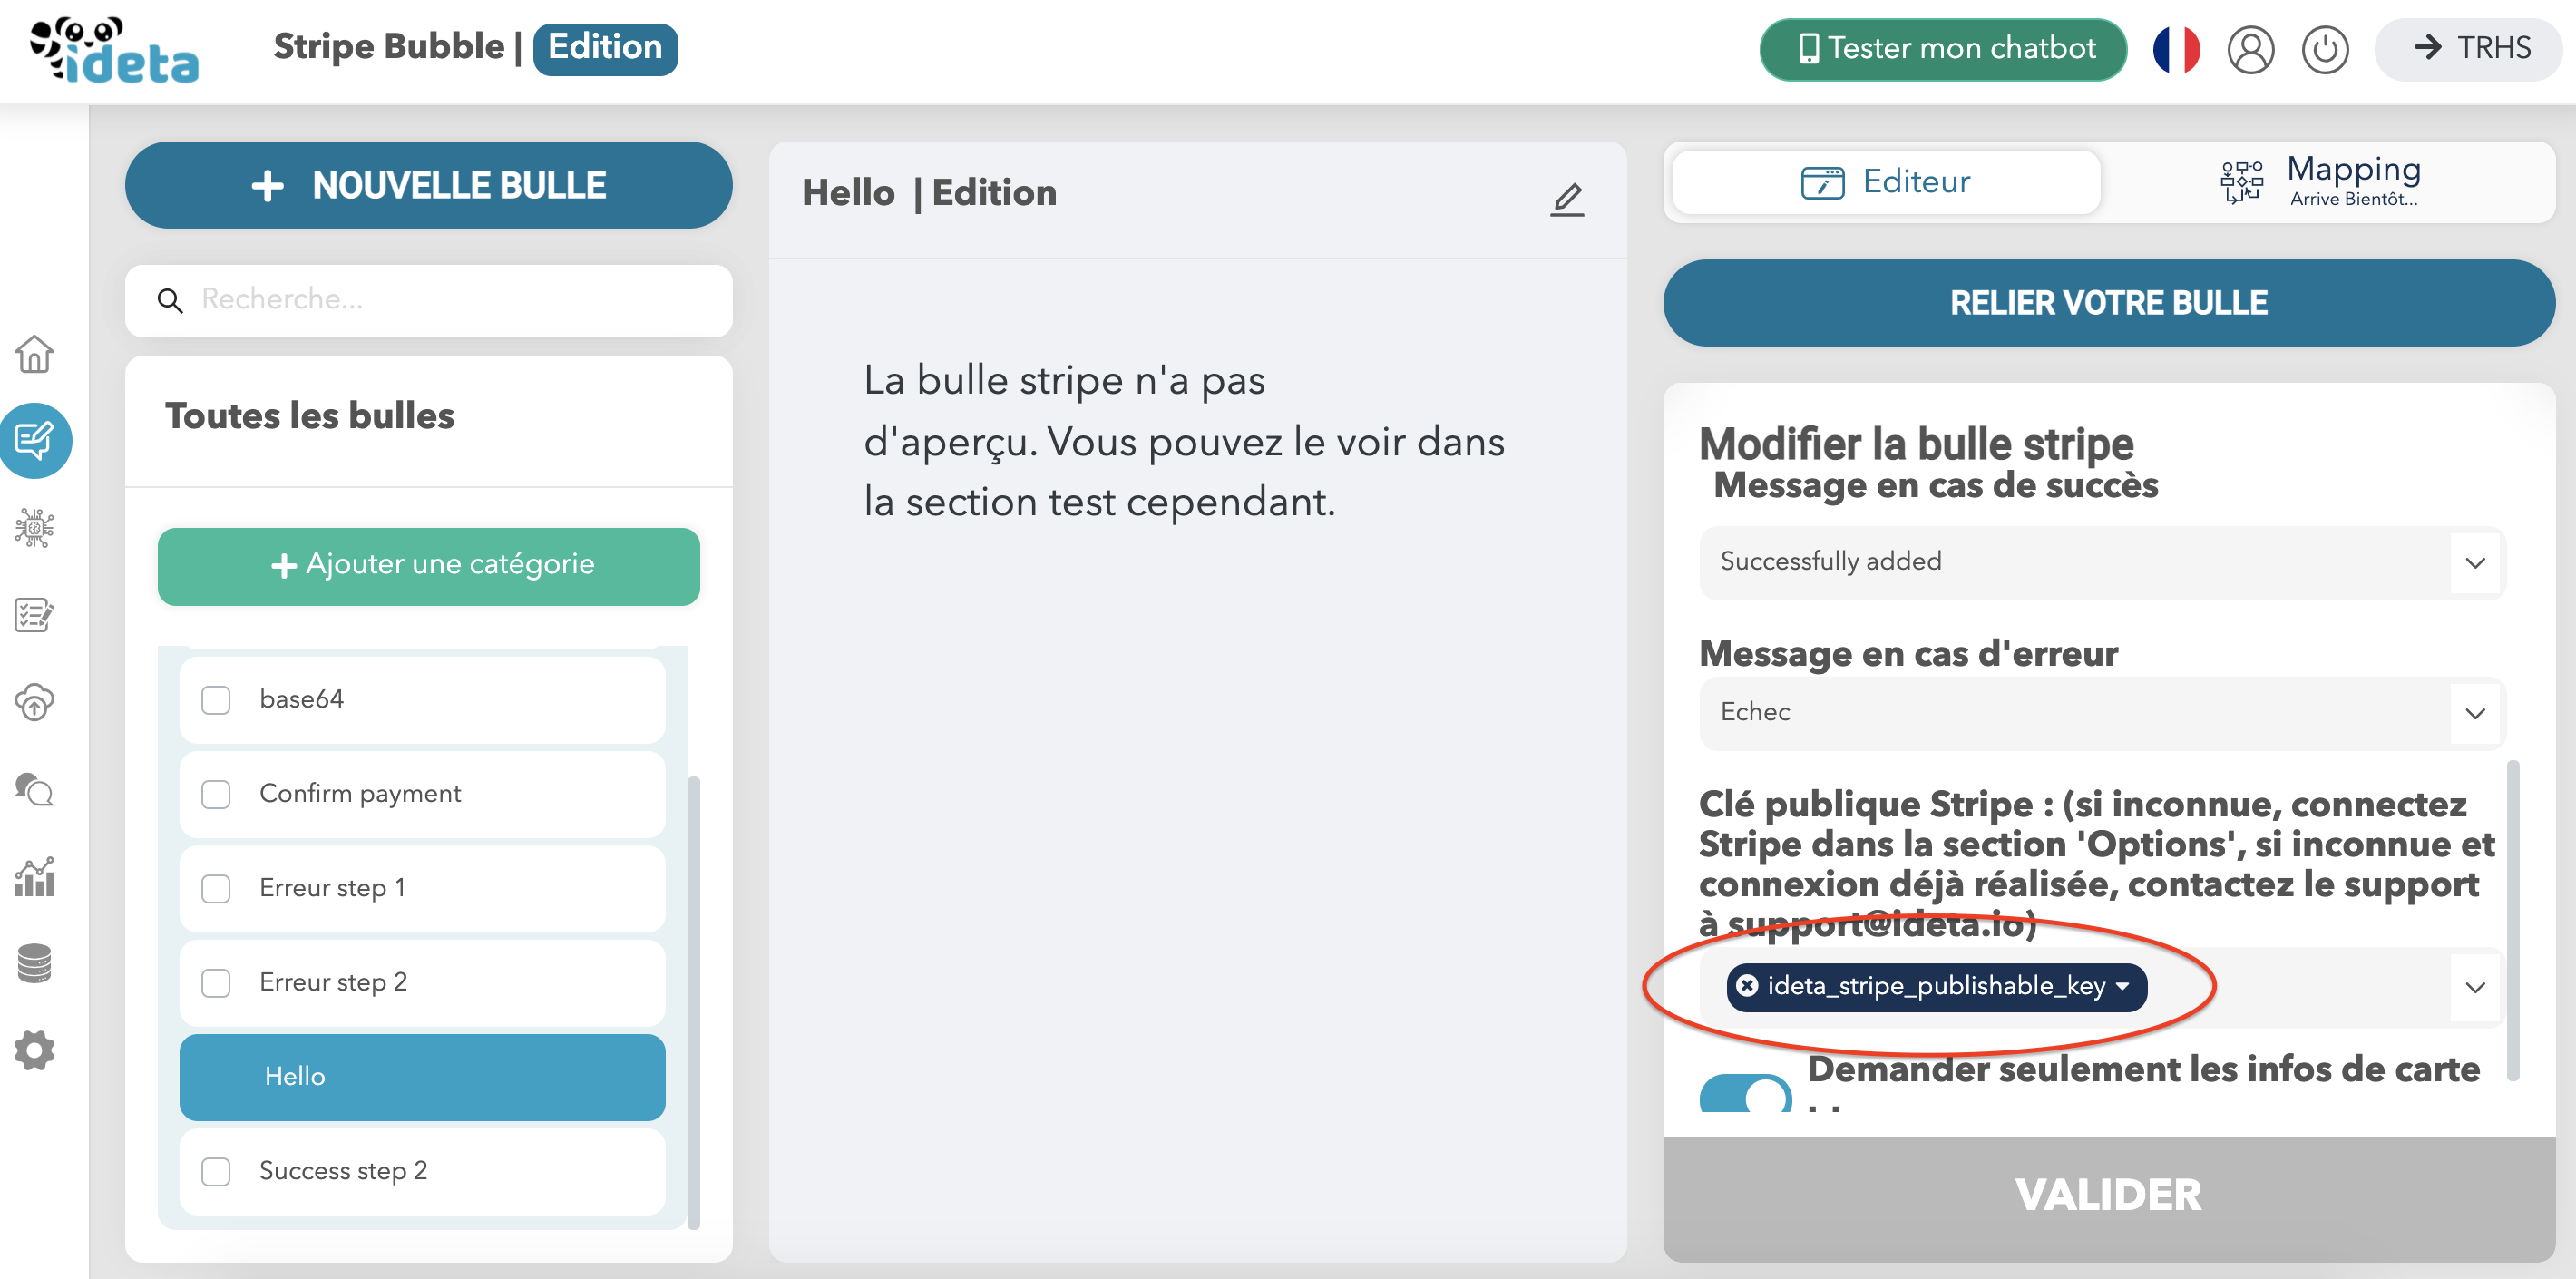
You can now change the information necessary (amount requested, wording...) If the connection worked well, you should have the variable ideta_stripe_publishable_key available in the form.
3- Test it
Go to testing and display your Stripe bubble.

We now need to work on what happens once the credit card is entered.
4- Process payment
Go to the data manager and create a conversation object variable (different for every user and therefore different credit cards) ideta_stripeCustomer with these properties :

This object will be filled in automatically once the credit card is validated.
Now click on "see more" and add a background action :
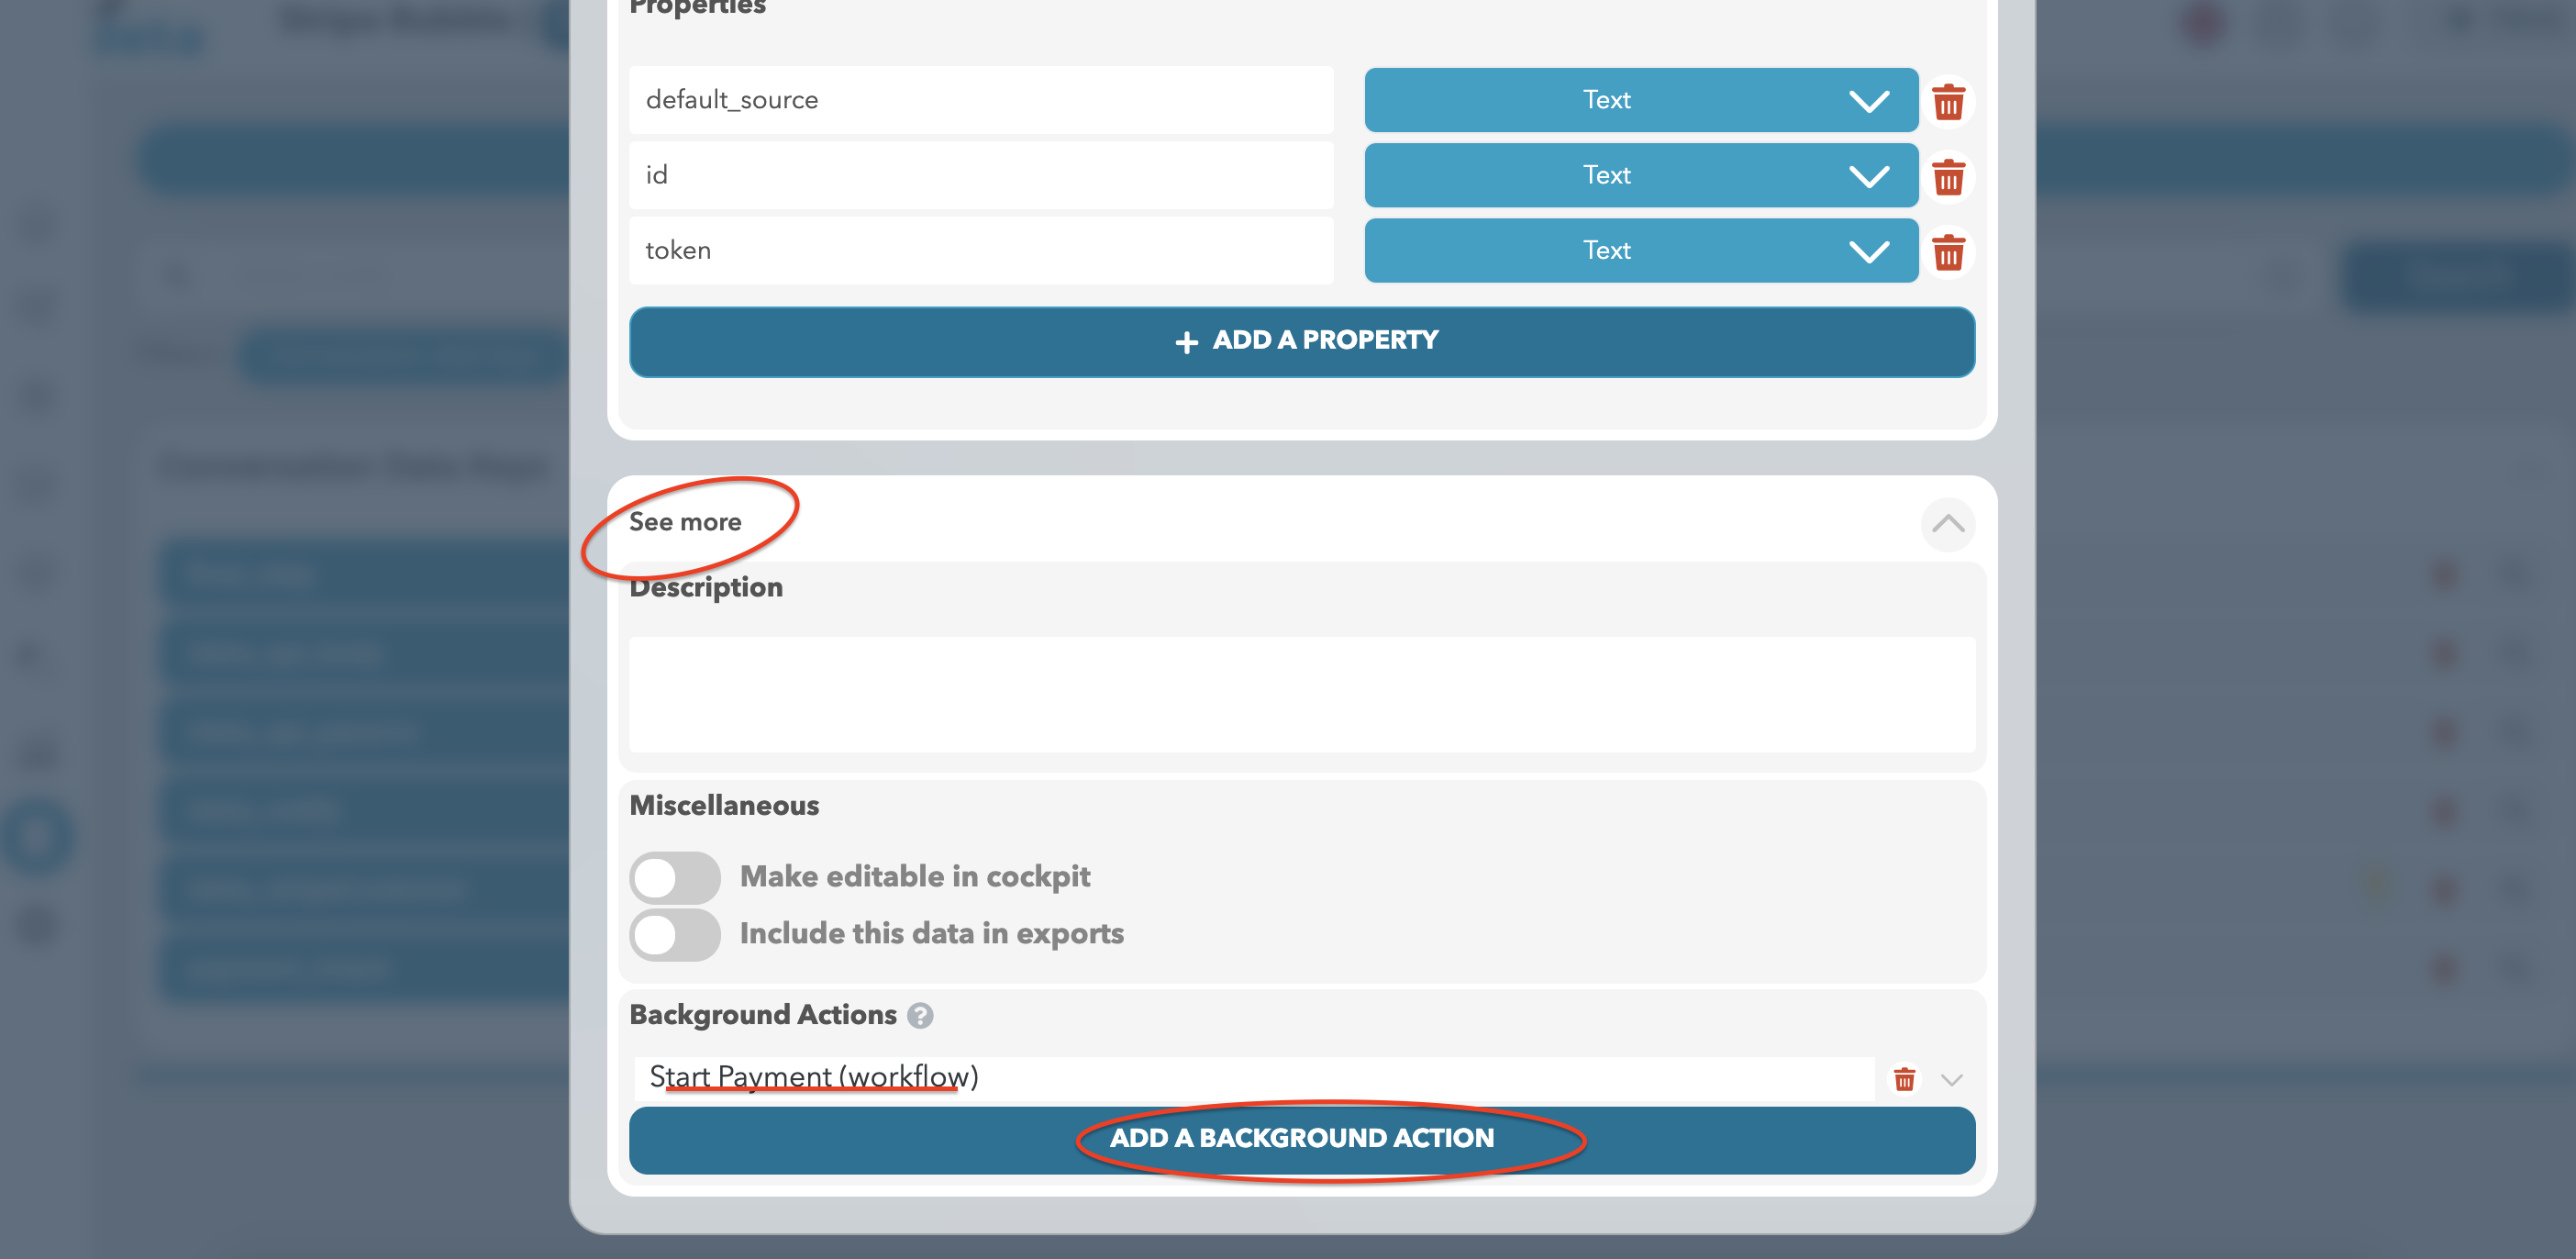
With these information :
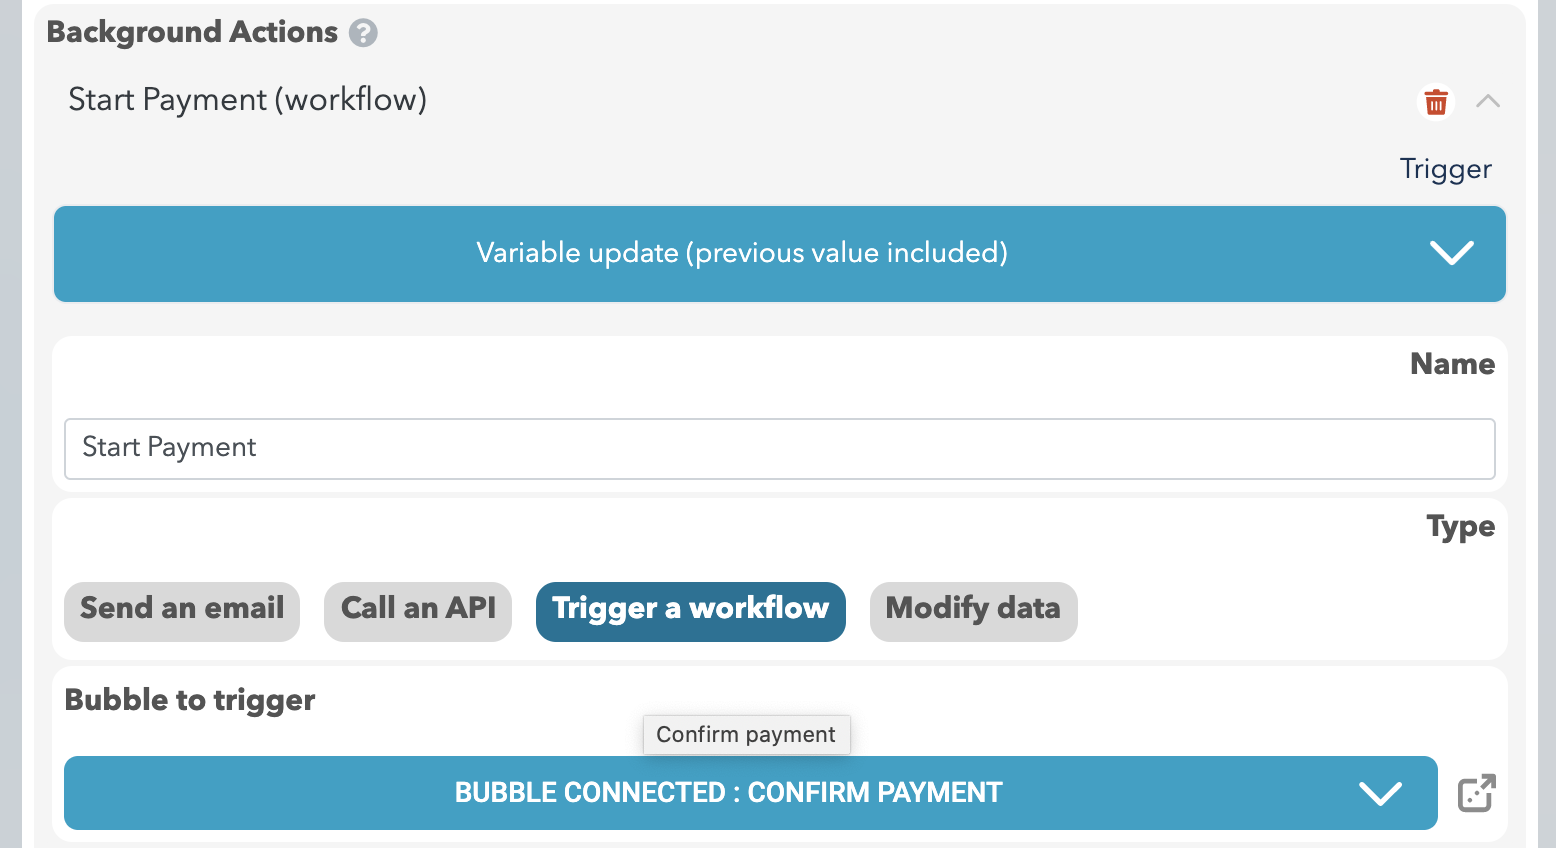
Now, you need to do three things :
Encode the ideta_stripe_access_token variable in base 64 :
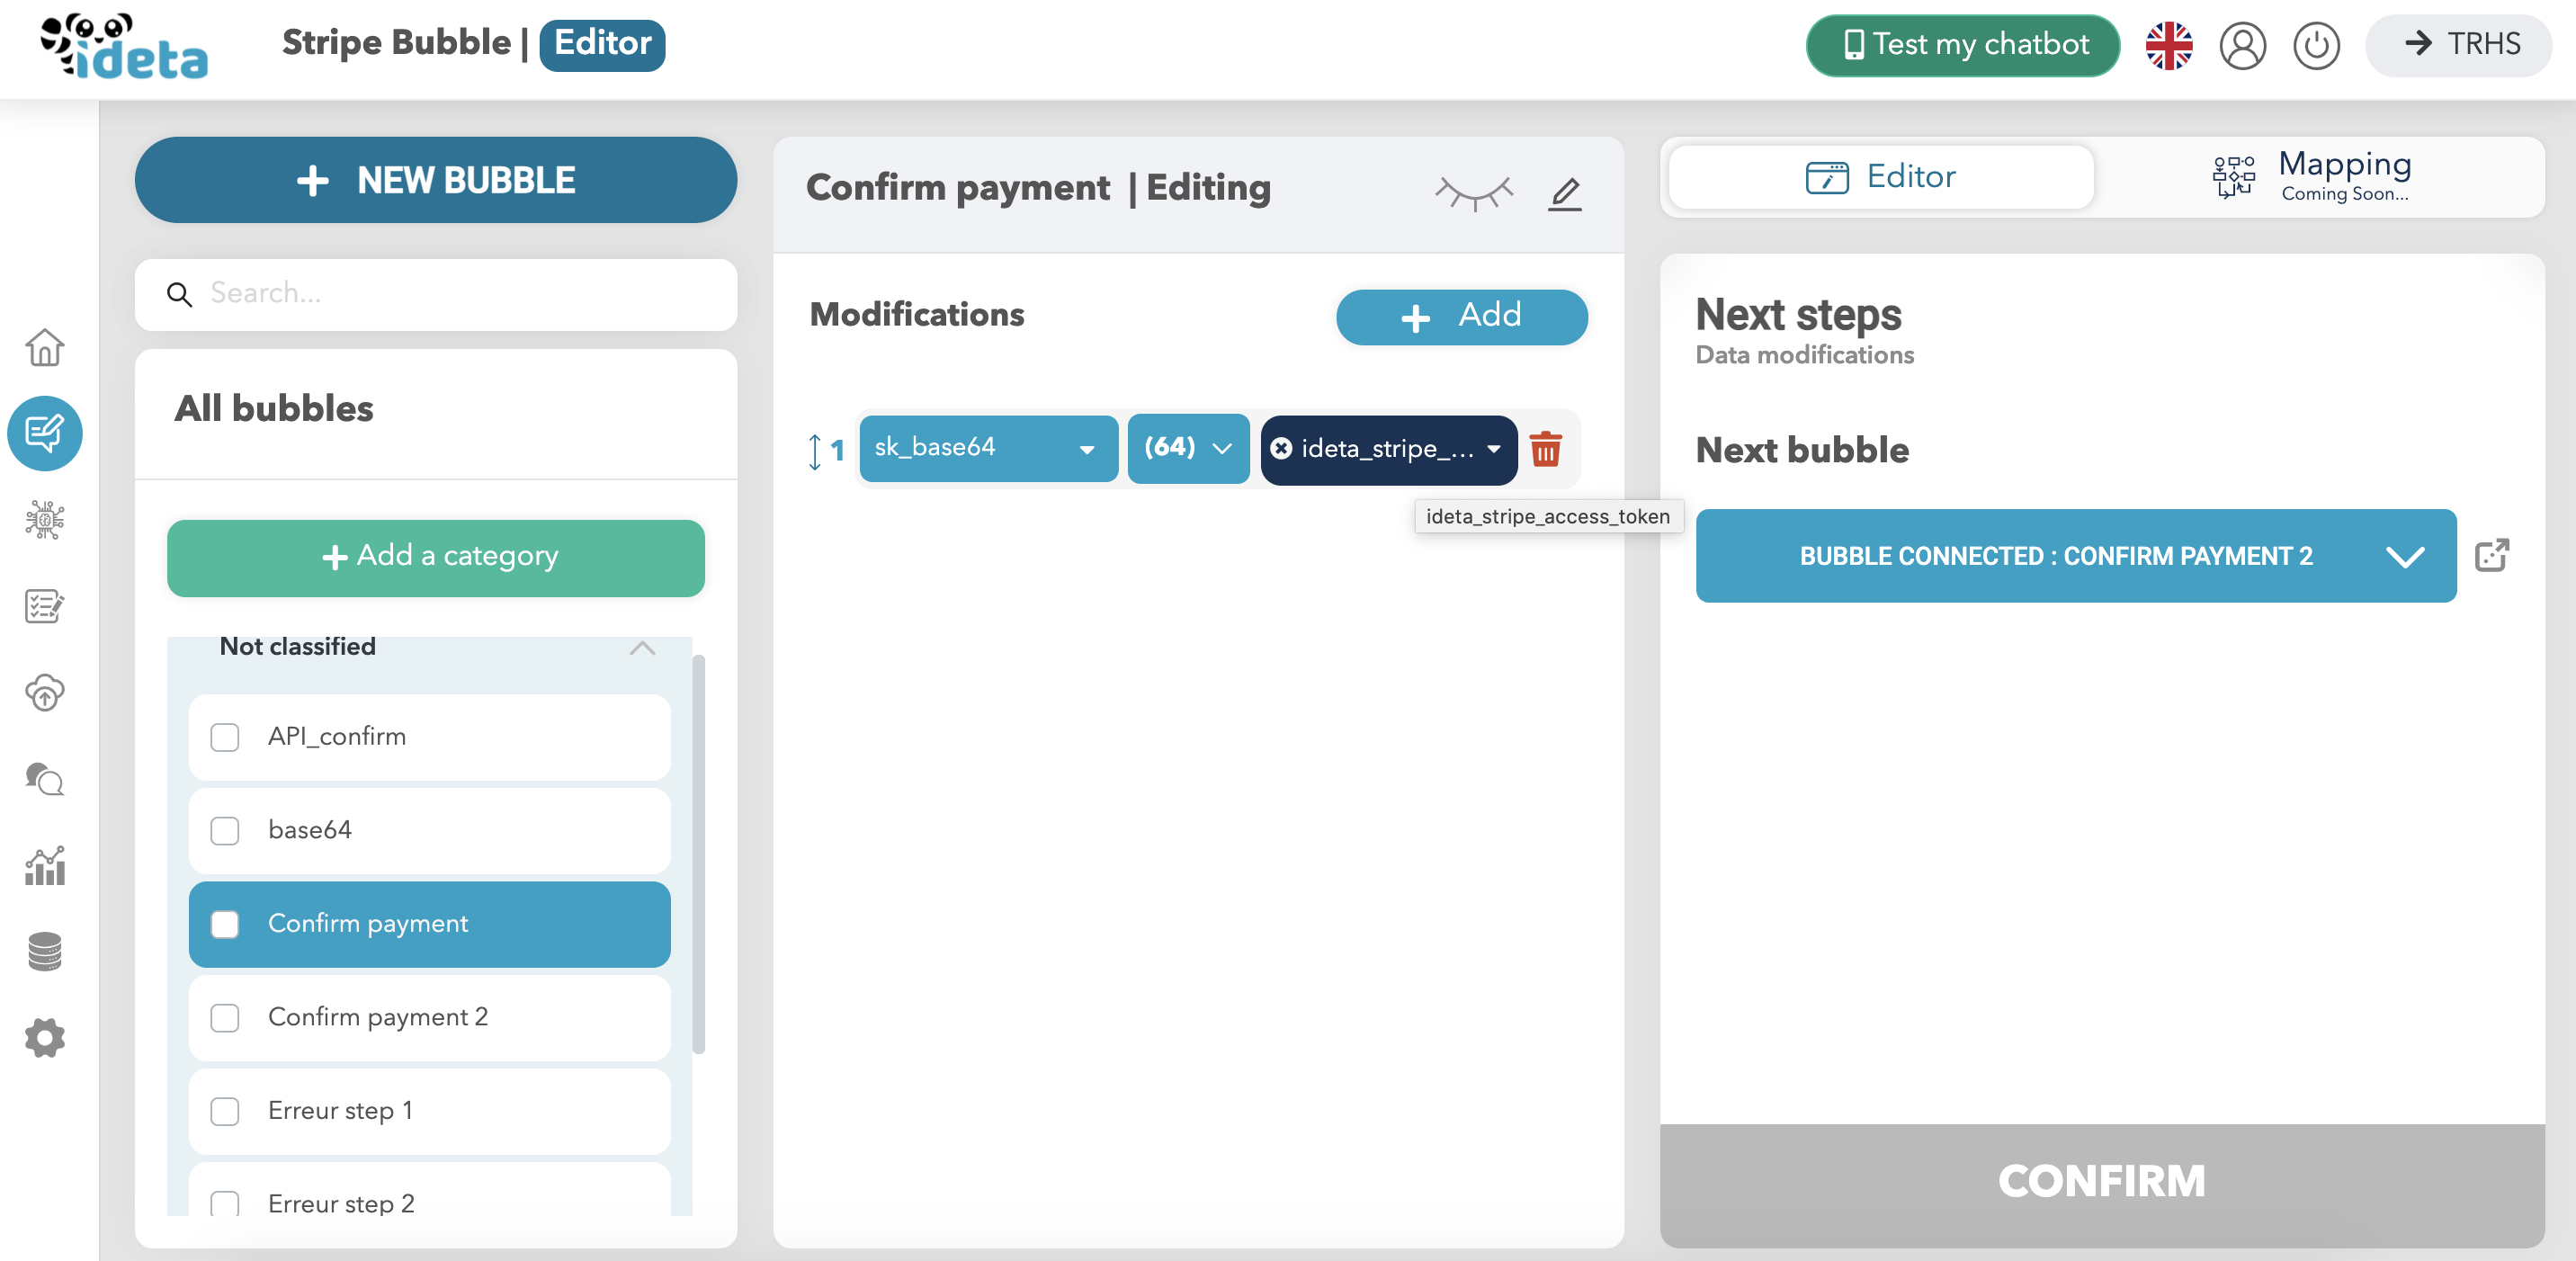
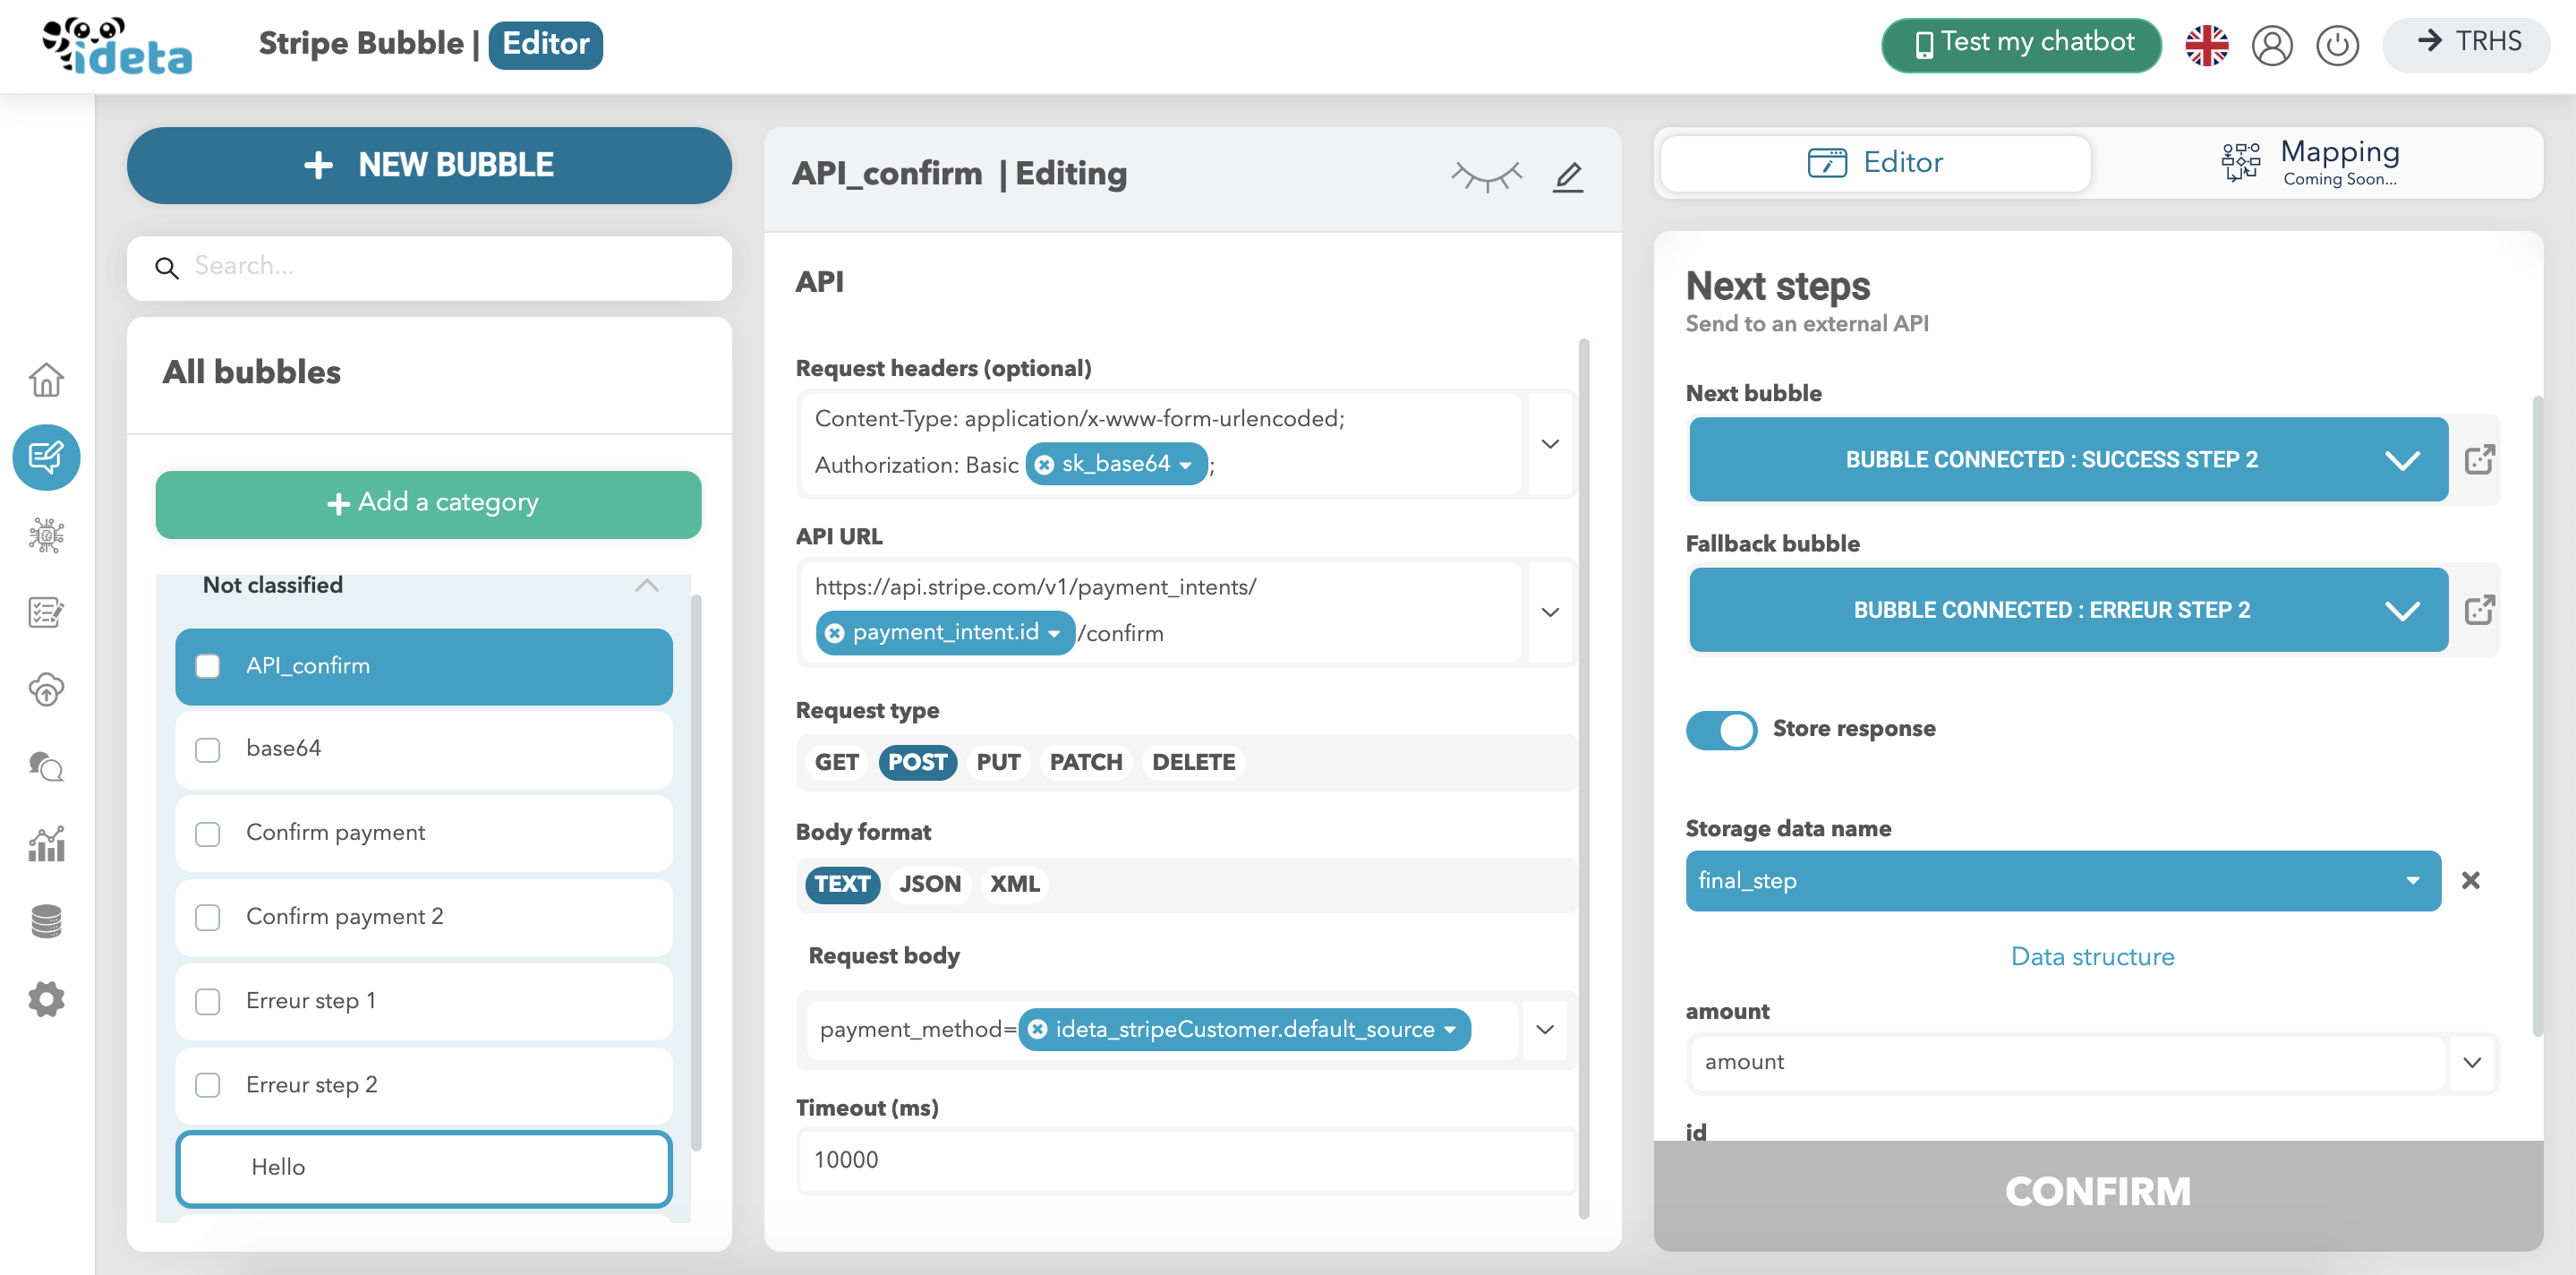
Then, you must create the payment intent :
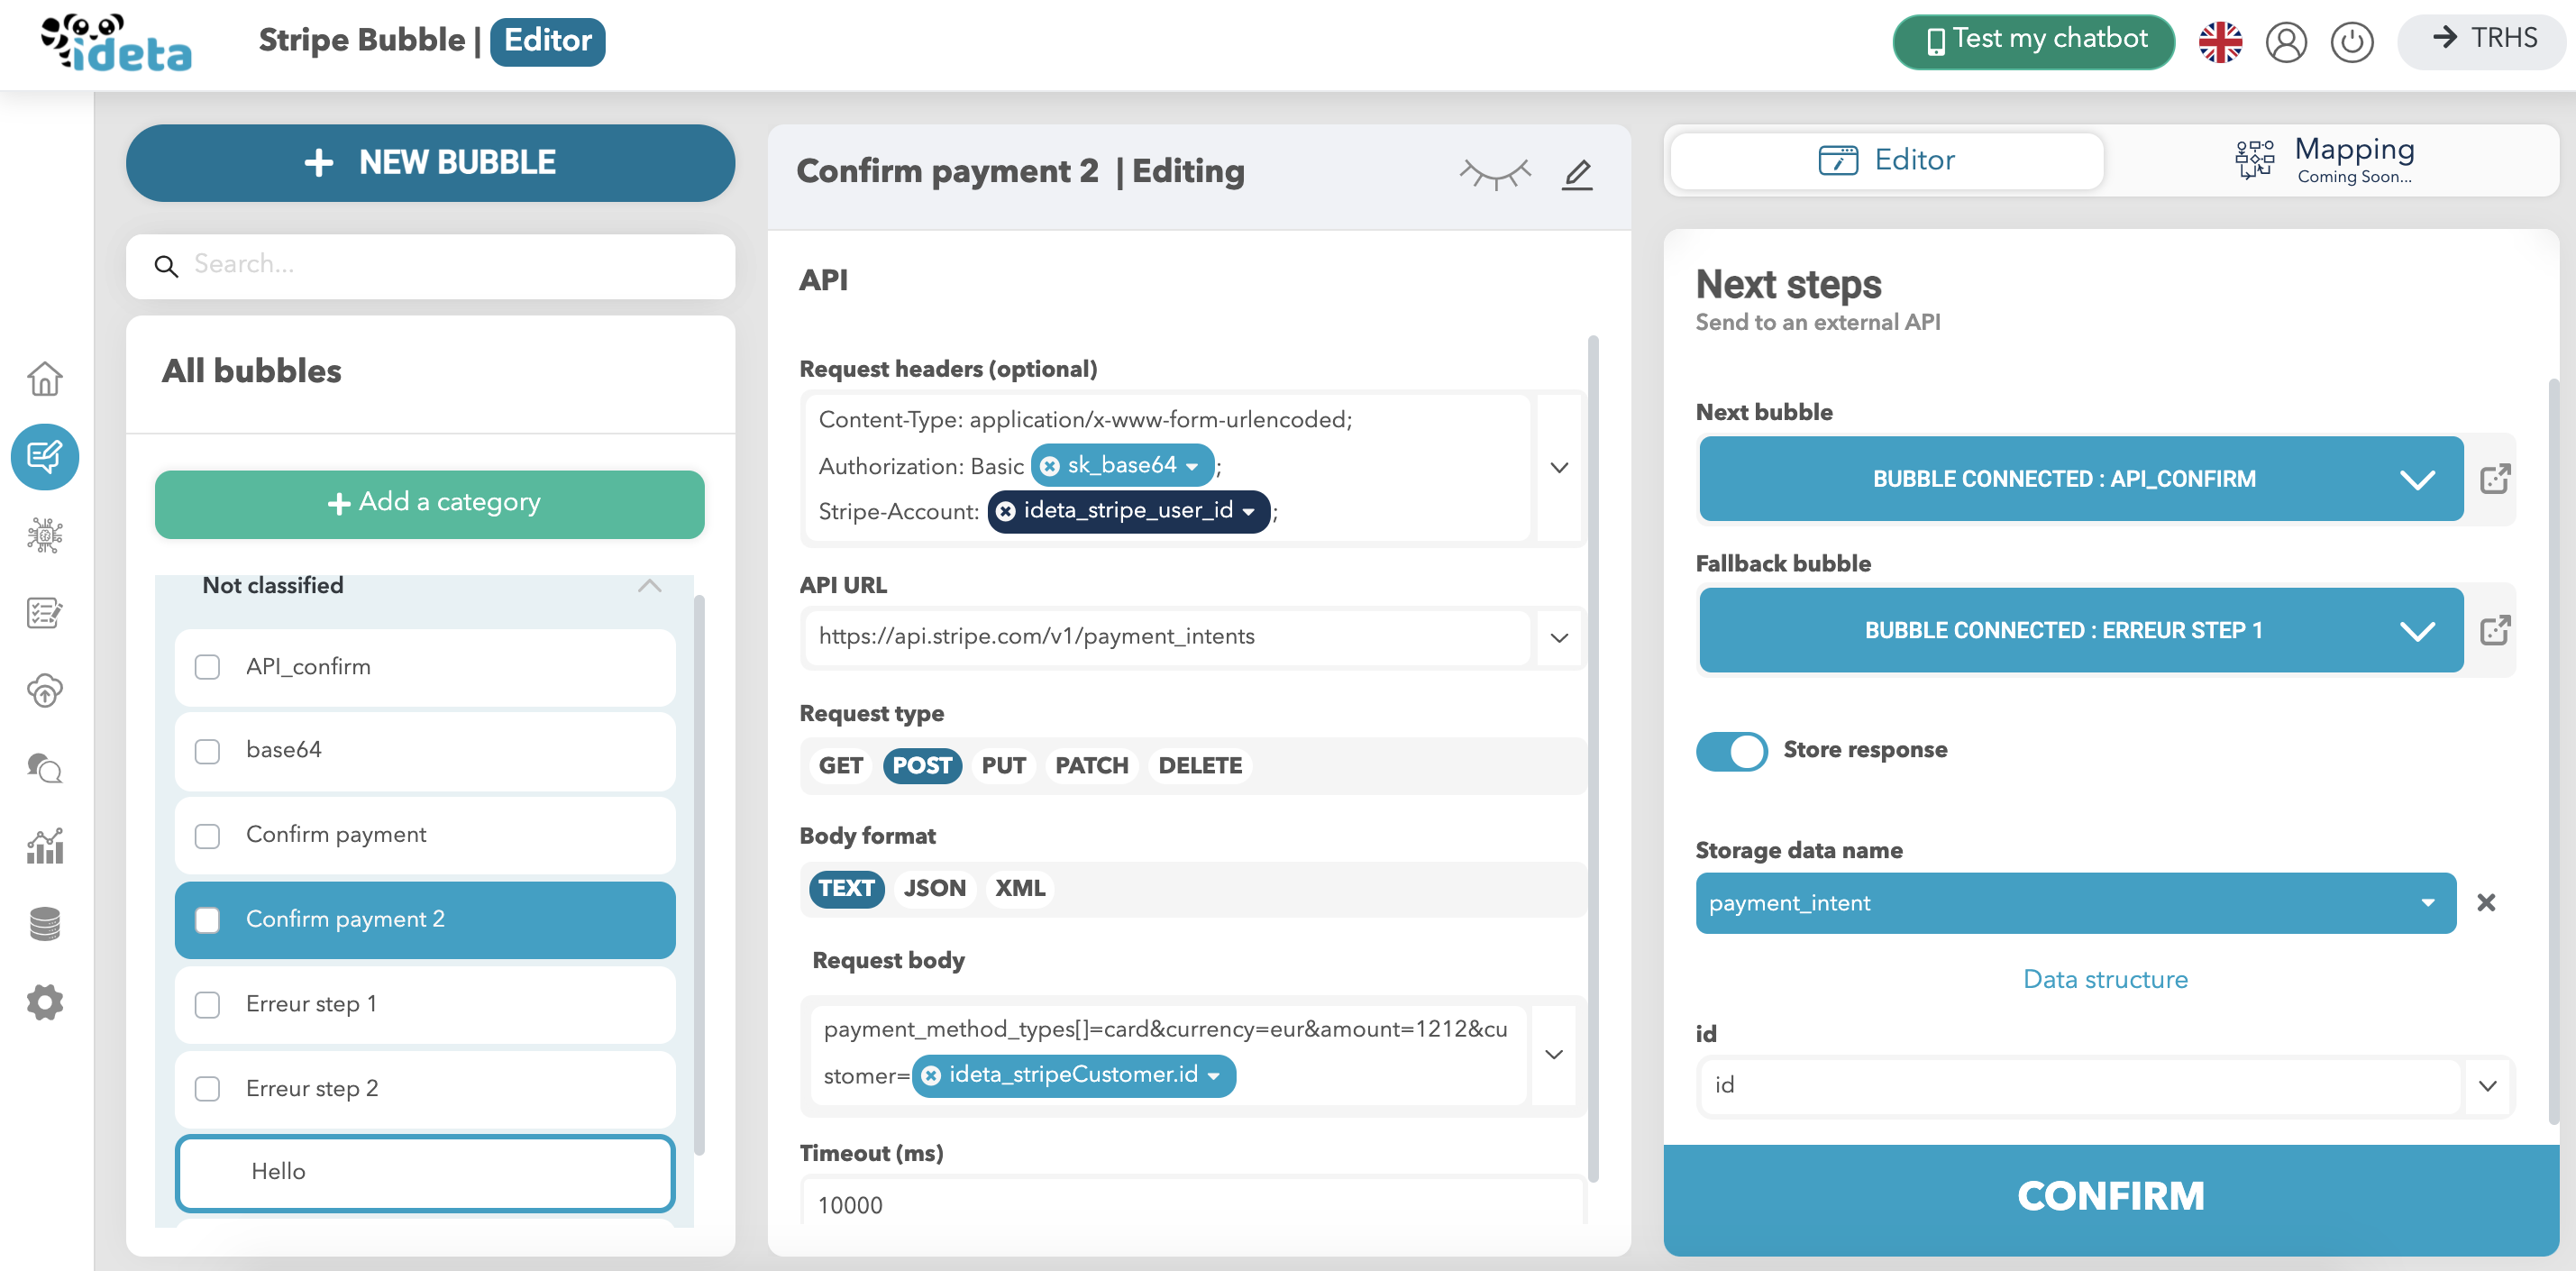
and catch it :
If everything works well, send a success message. If not, use the fallback bubbles in the next steps of every API call to prompt the user what to do.
That's it ! You can now collect a credit card and collect a payment. They will both appear in your Stripe Dashboard. Enjoy !
Latest News